[Originally posted at OnEnsemble.org]
Update 161112
It's fun to see these images again as Hiro and I work on our apartment remodel. It's as if all those past furniture experiments were building to now... when we finally have a place where we can do anything we please, and we plan to stay long enough to use nice materials!
Original Post
I love building stuff, especially furniture. But before you imagine finely-crafted, oak and brass masterpieces, my furniture is more... um... experimental. I use 2x4s and plywood, and very simple tools.
Here is my current desk. (Click on the pictures for larger versions.)
Read on for a photo-retrospective of some of my past furniture, along with tips and tricks for making your own things! The post is rather long... my apologies if the page loads slowly.
Contents
- Pico/Union apartment
- Gardena apartment
- Little Tokyo apartment
- Torrance apartment
- Tips for making your own inexpensive furniture
- Tools
- Considering cost
Pico/Union apartment
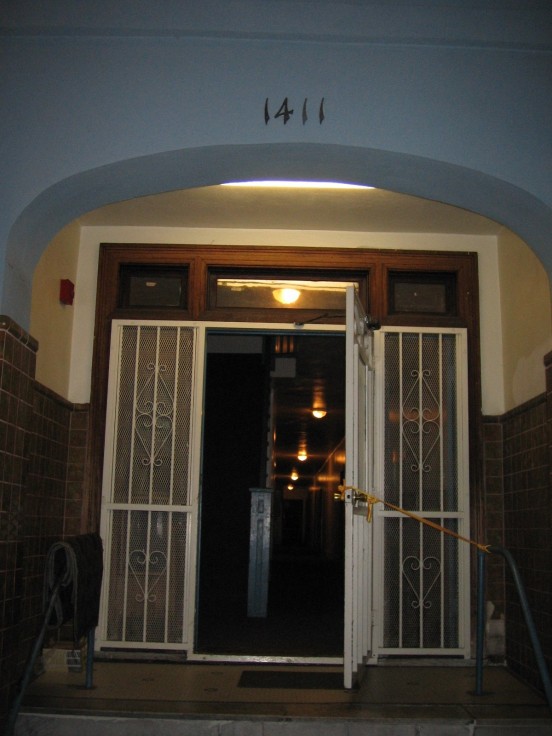
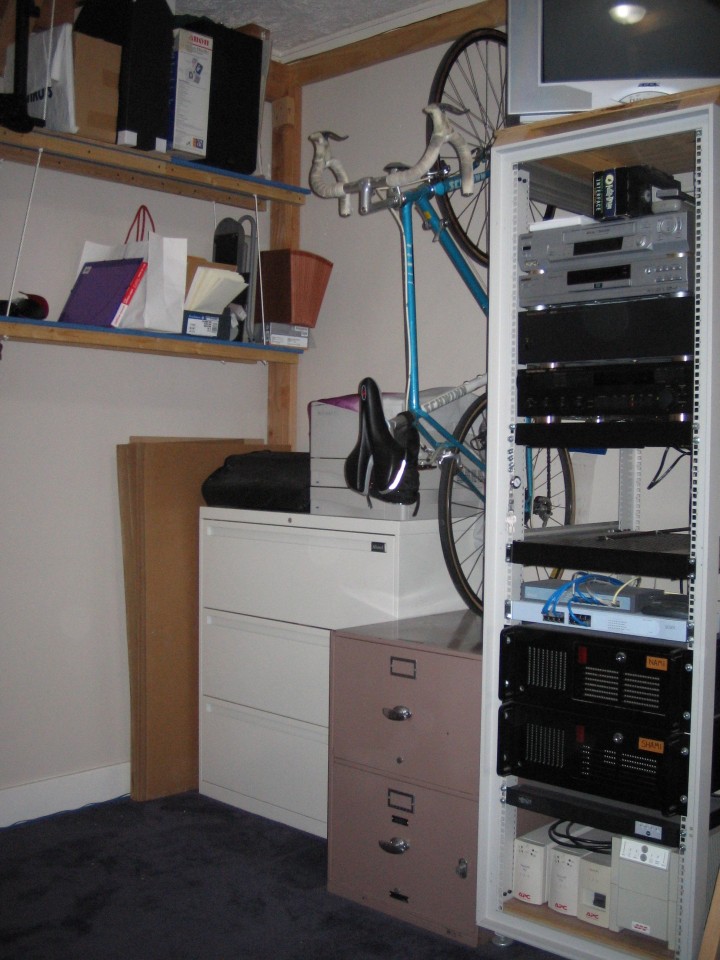
Burlington apartment building
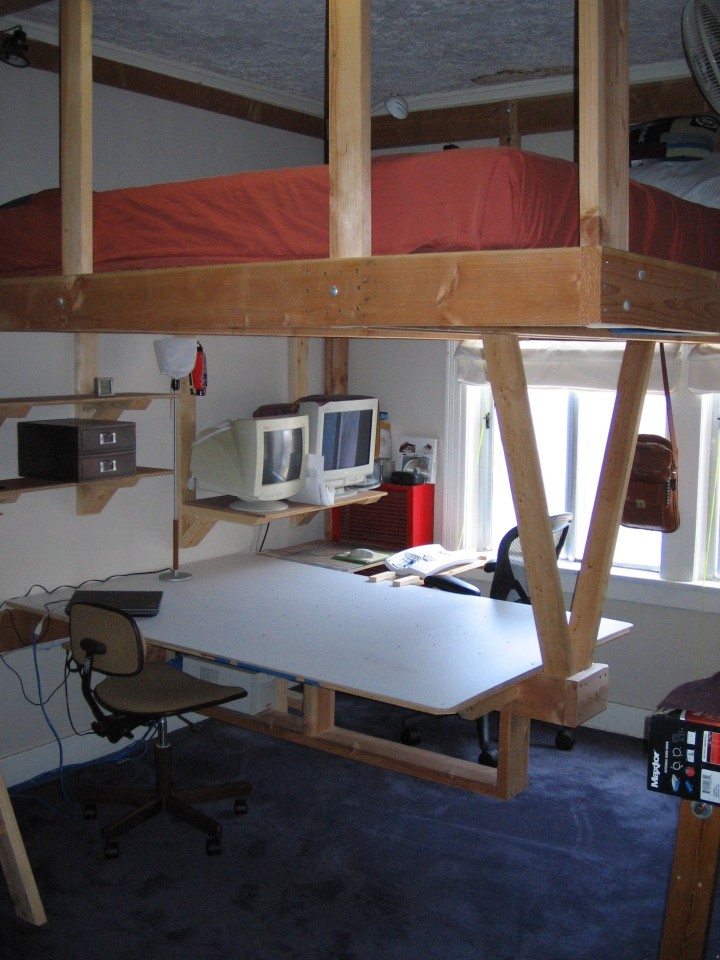
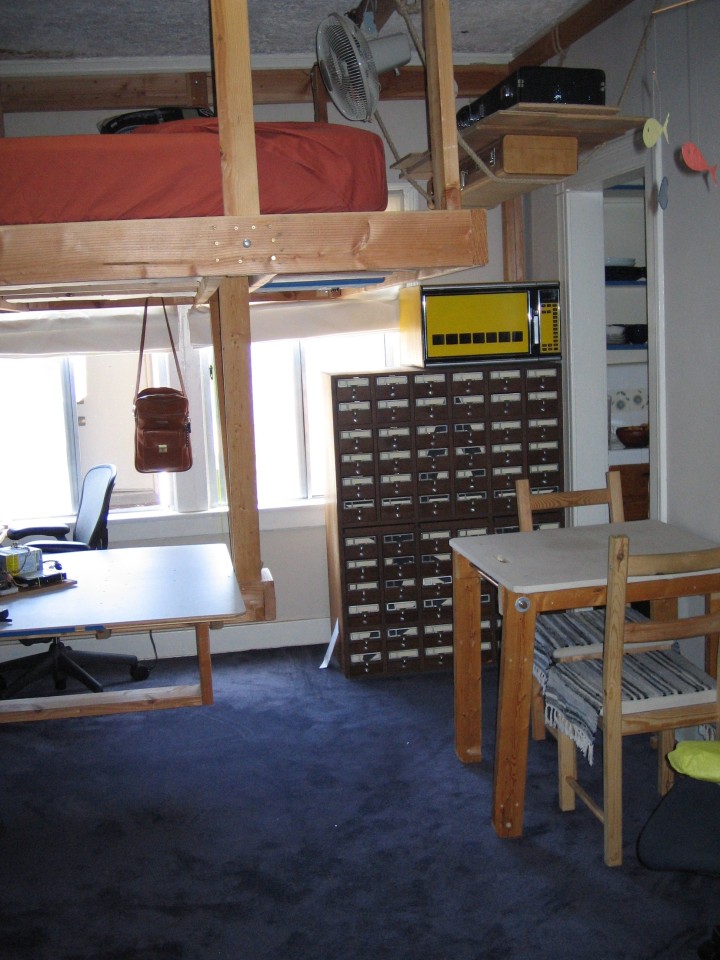
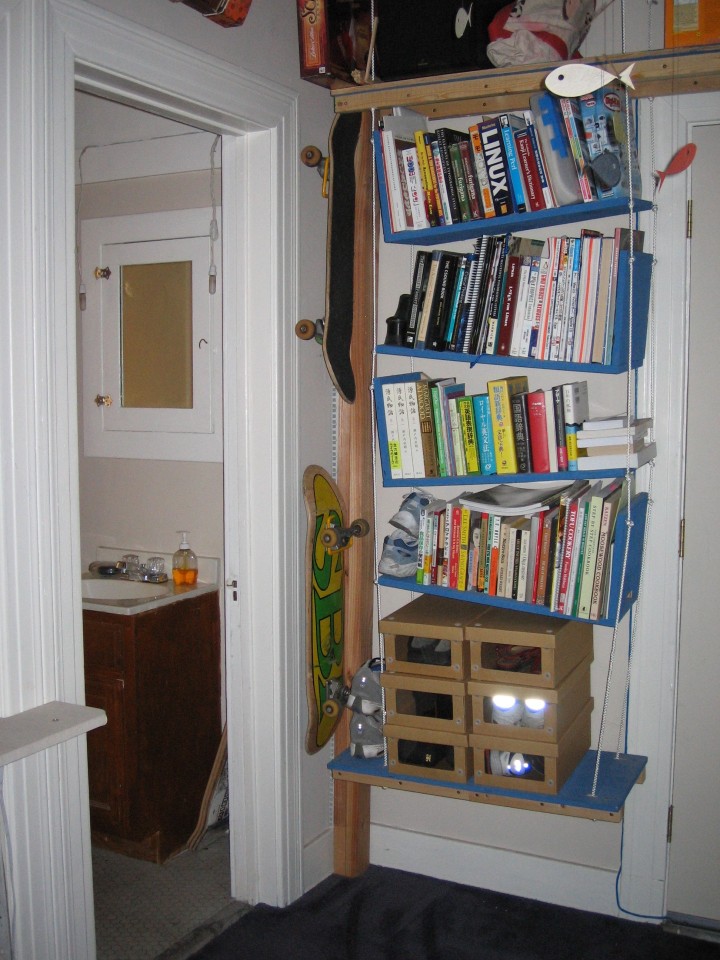
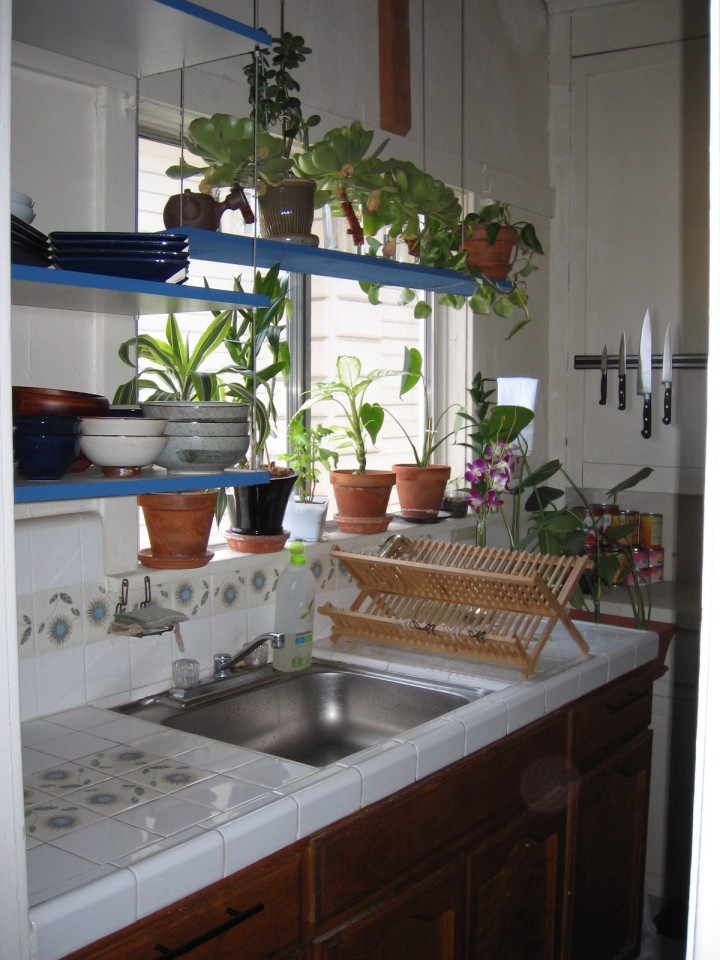
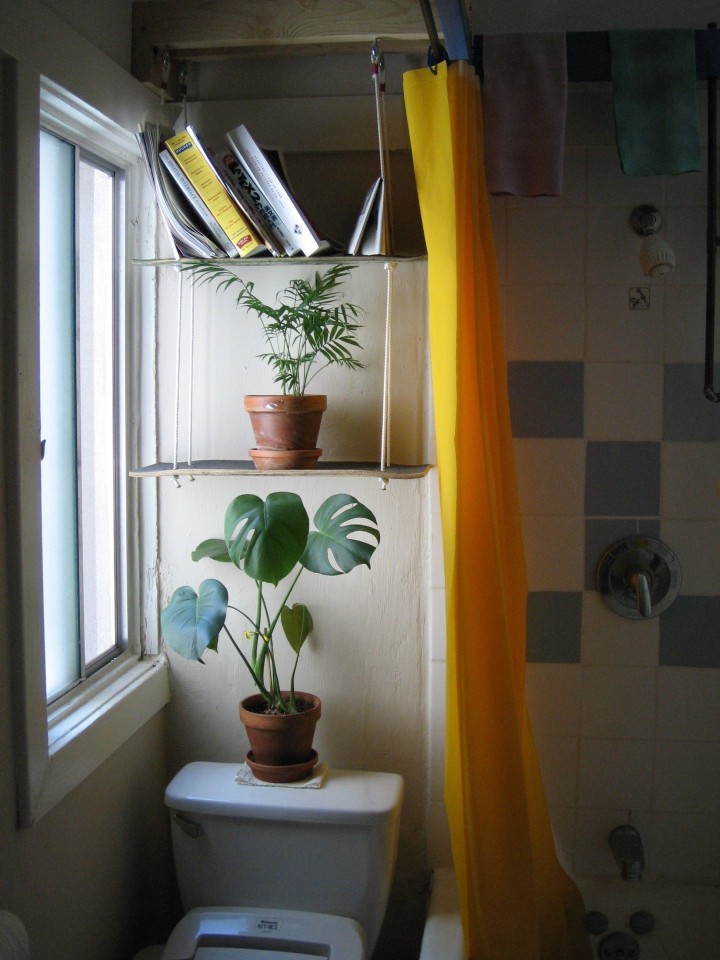
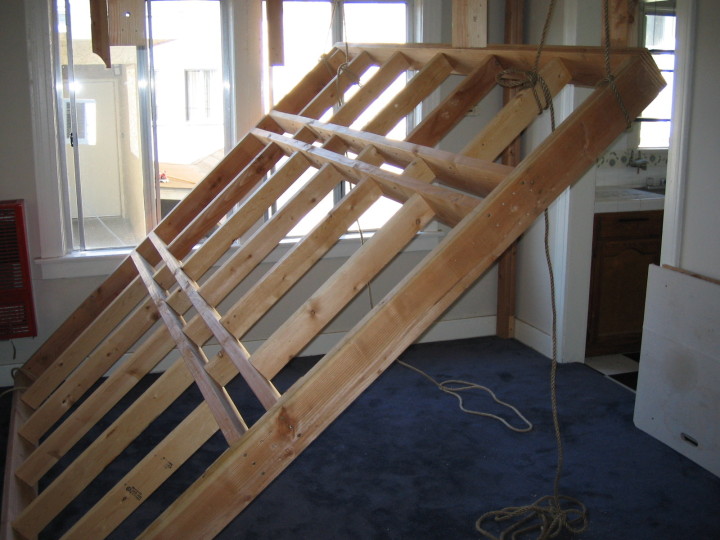
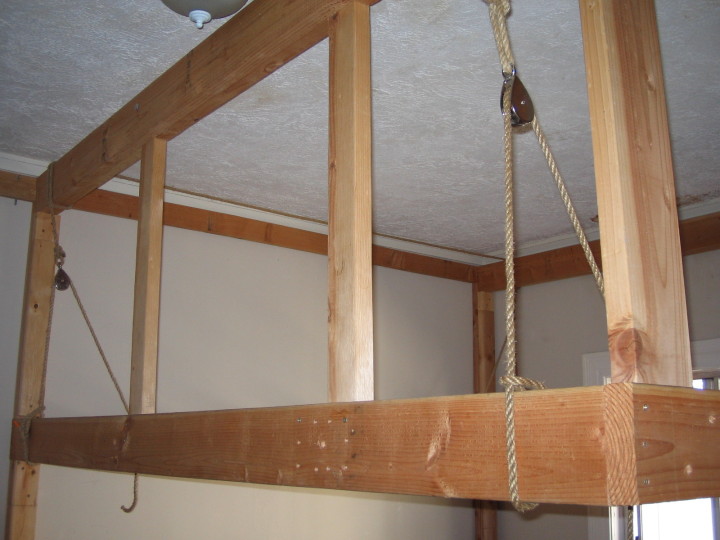
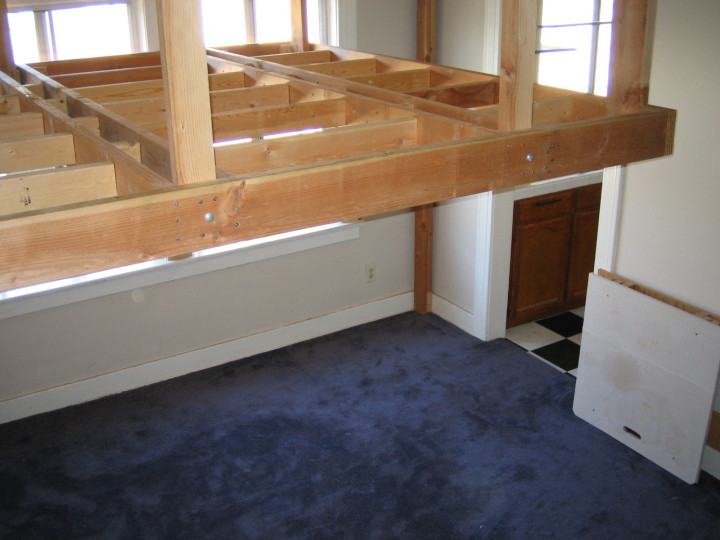
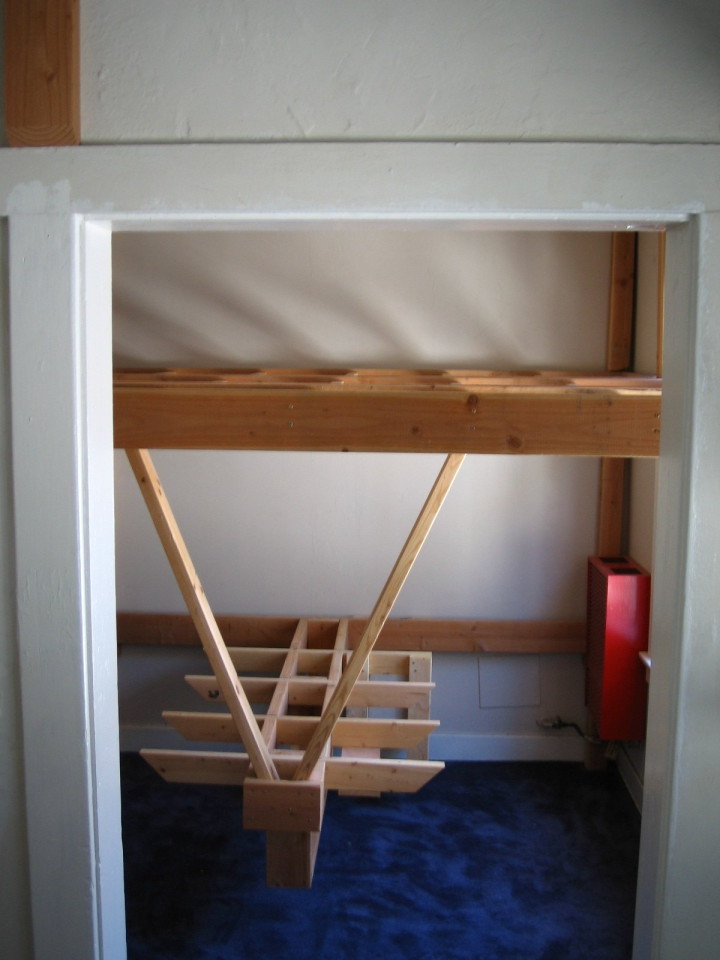
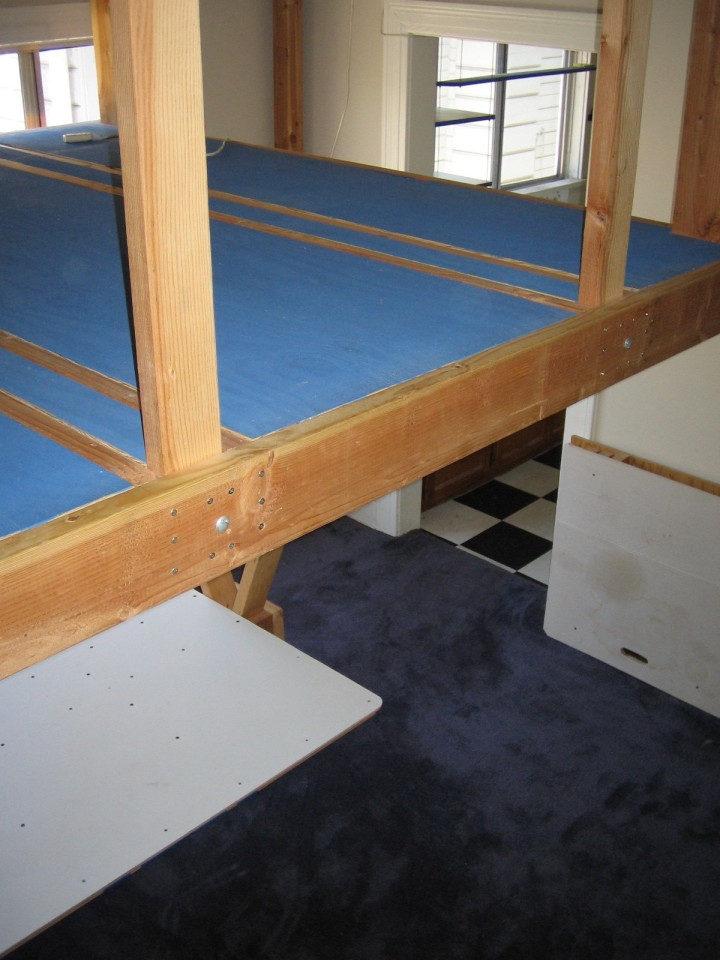
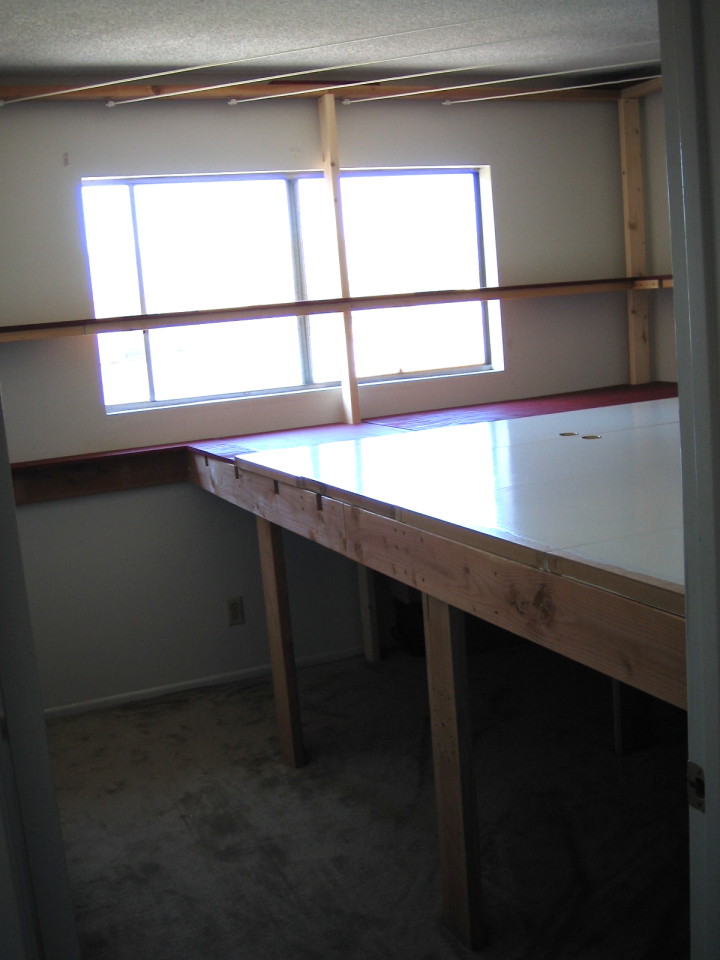
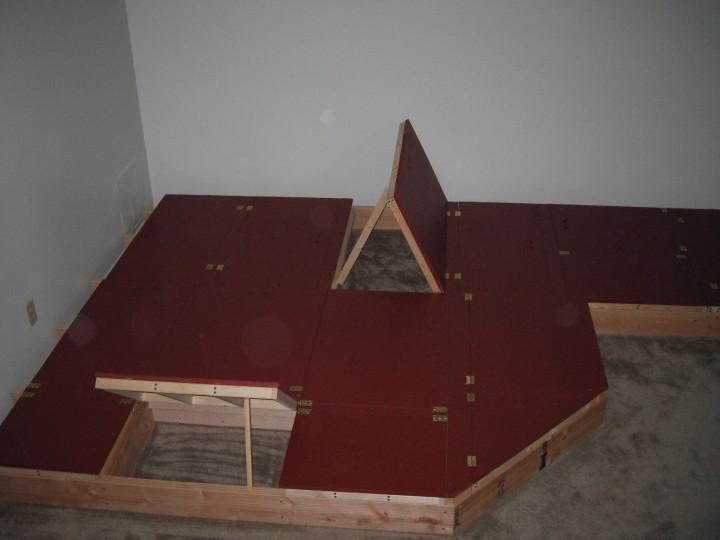
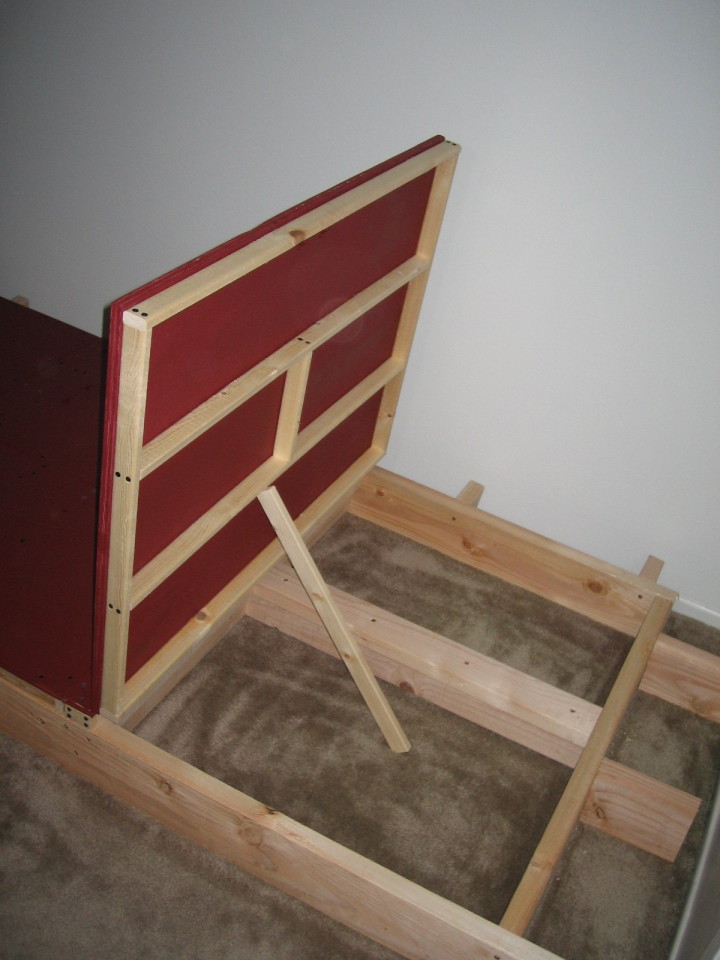
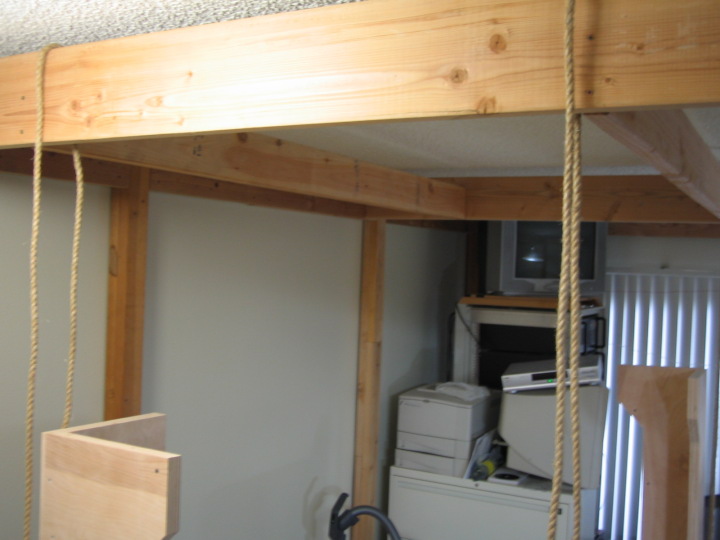
After moving back from Japan, the first place I lived was the LA Pico/Union area, right near Staples Center. Maz actually lived in the next-door apartment for a short while (good times!). It was small and a bit run down, but also the most satisfying somehow. About a year after I moved in, the room design received a major overhaul, to make room for Hiro joining me. The final version featured a lofted bed and suspended desk, a fold-out table, and lots of hanging shelves. The bathroom was bright and cheery and I had a great setup for turntable practice.
Successes: easy to clean floor (even the refrigerator was hanging), desk foot rest, slanted book shelves, lots of natural light, ready-to-practice TT setup
Not-so-successes: not enough headroom above bed, fabric covering chairs and table got grungy, all tub resurfacing attempts failed


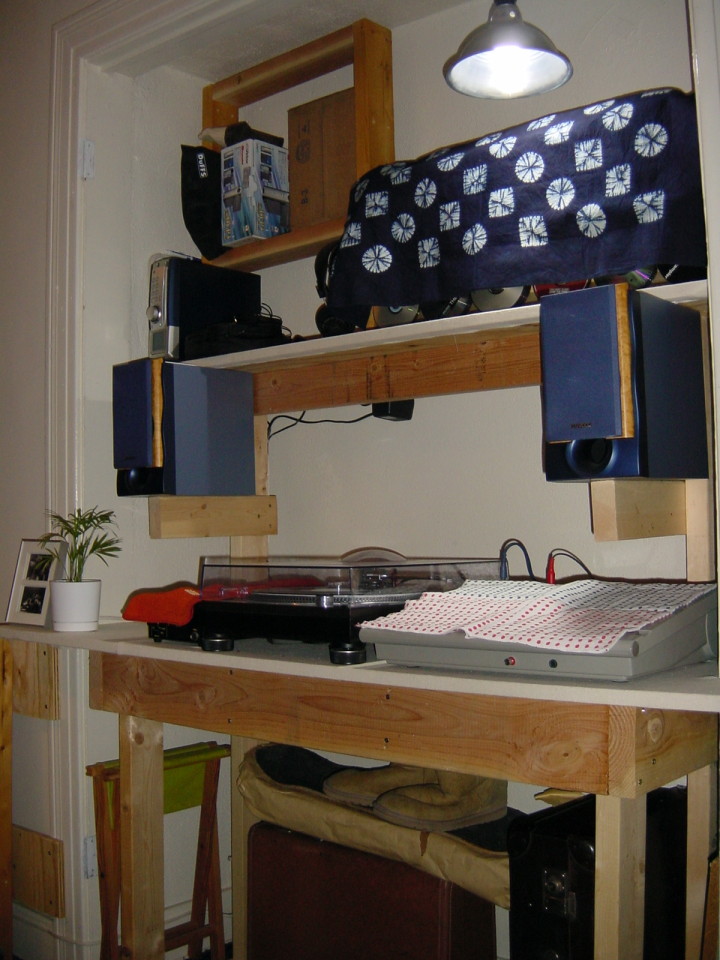
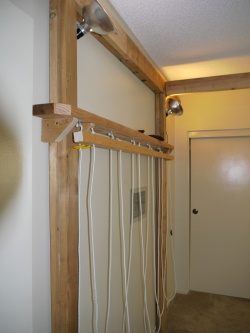
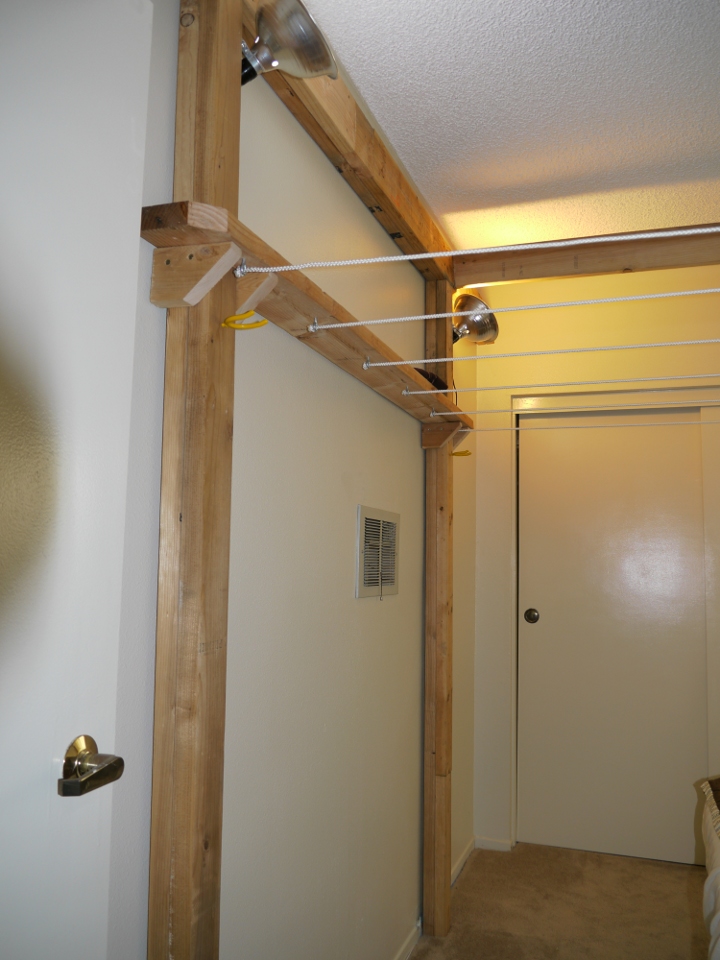
The suspended bed and desk were what made the tiny space livable for two. Here are a few shots of the construction process.
![]()

Gardena apartment
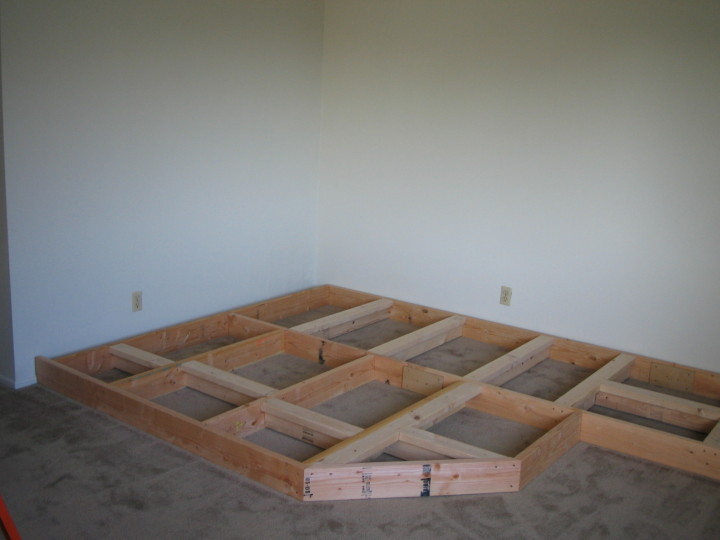
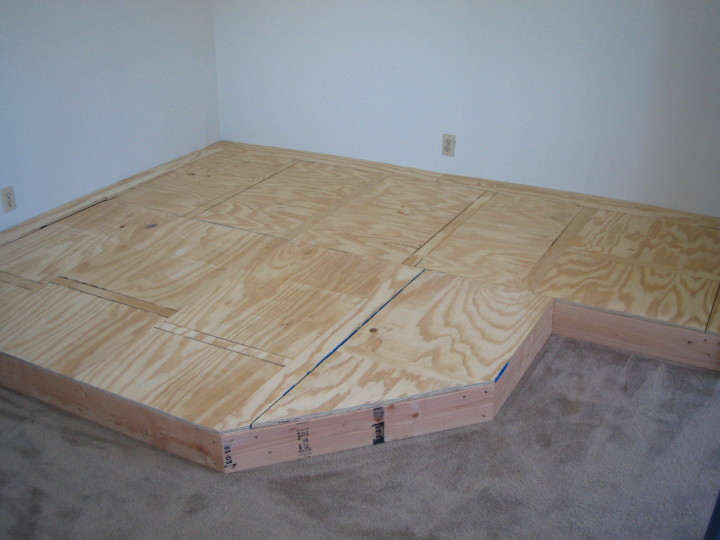
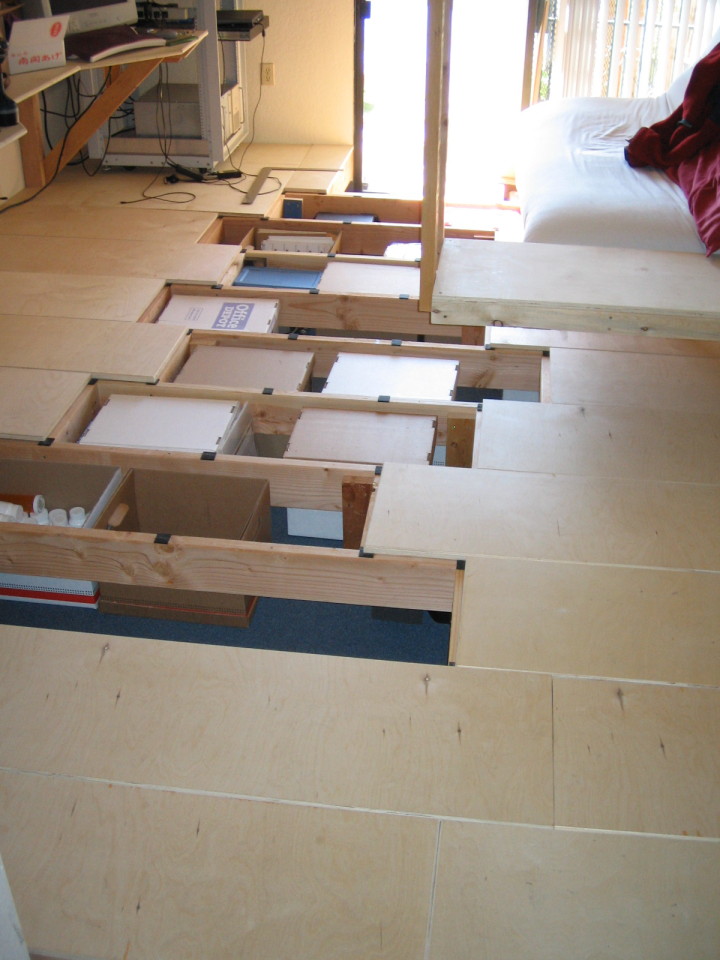
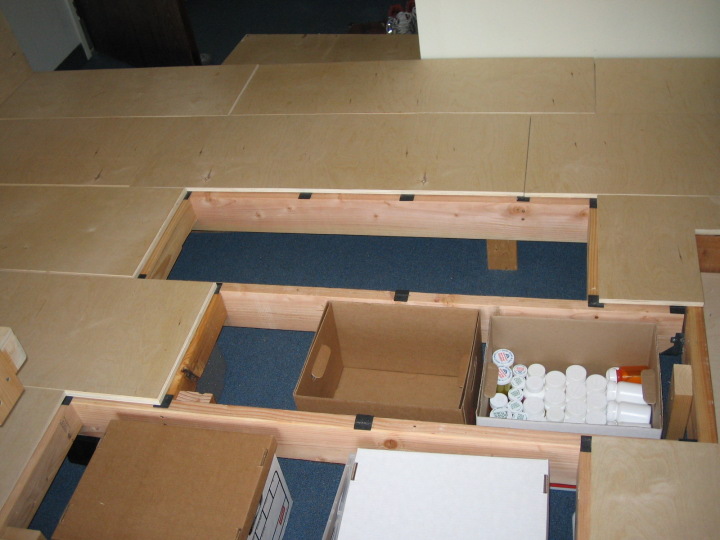
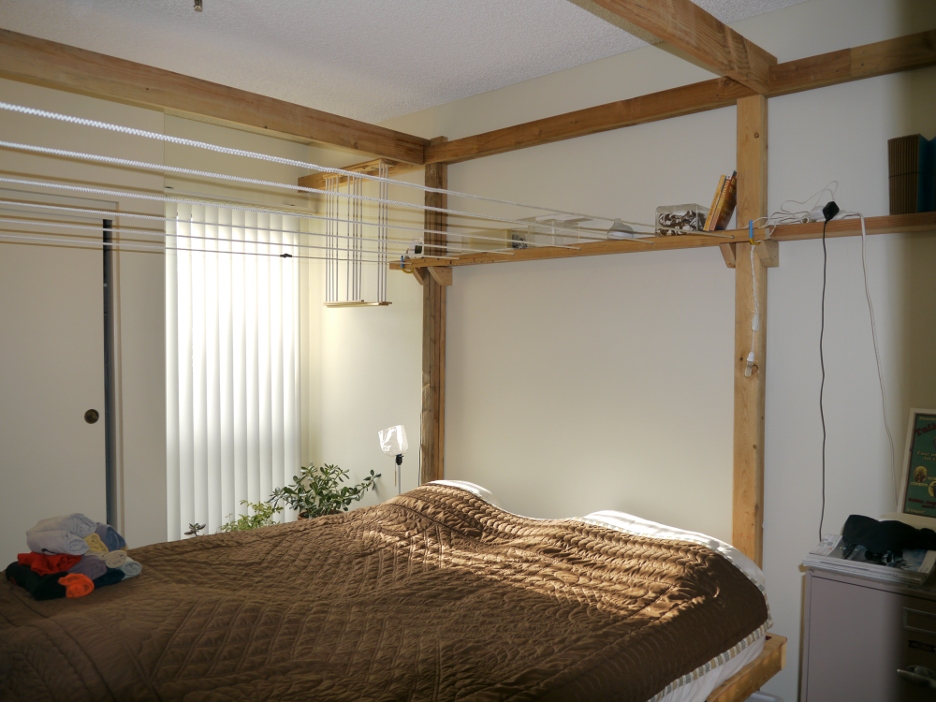
Hiro got a job at JCI Gardens Apartments in Torrance and spent a few months making the commute by bus. An inexpensive apartment within walking distance of her office became available and it was too good to pass up. So we disassembled the furniture and carted the wood to the new place. This time we made a lofted bed with storage beneath. To save on plywood, we used the doors off several closets for some of the paneling. The ropes above the bed were for hanging clothes to dry and was a surprisingly efficient use of space (hanging clothes during the day, sleepers in the bed at night). I tried in-floor storage beneath the desk, and made a simple couch for Hiro. In cleaning out our stuff, we came across the x-ray that Hiro had taken for her US visa application. We didn't have the heart (har har) to throw it away, so we turned it into a weird window clock.
Successes: floor storage, offset L pantry shelves (holds tall and short items efficiently), crawlspace storage below bed
Not-so-successes: vertical support on kitchen desk sometimes annoying obstruction, cheap futon for couch loses cushion over time, for the in-floor storage, build the base supports to match the panel sizes (not the painstaking other way around)


The in-floor storage was the big experiment of this apartment. (And the concept gets refined in the next apartment.) Here are some shots of the construction process.
![]()
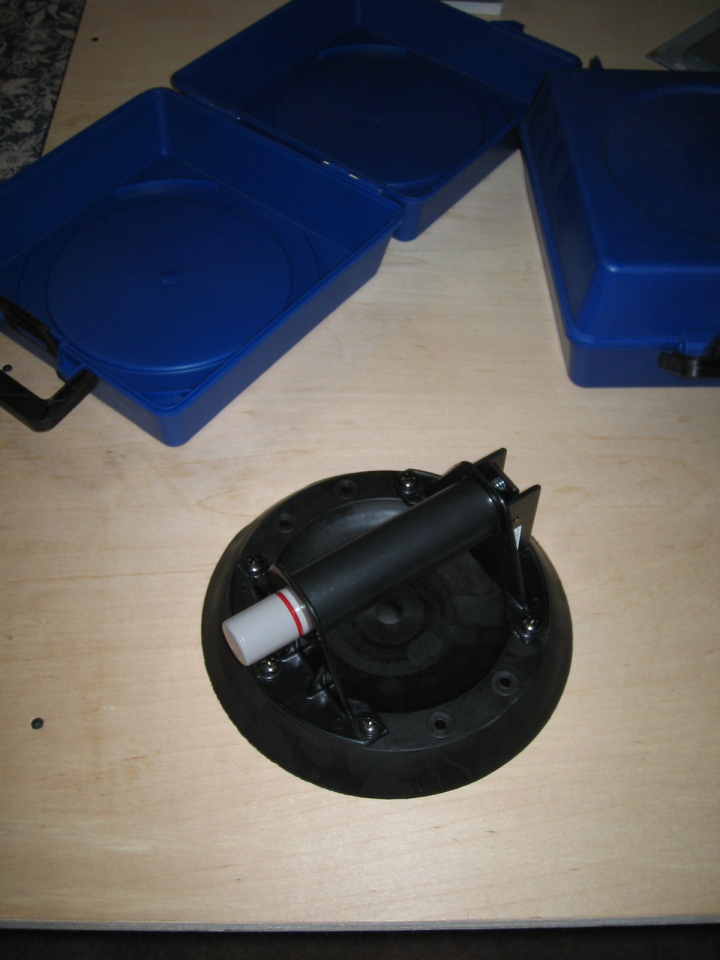
Little Tokyo apartment
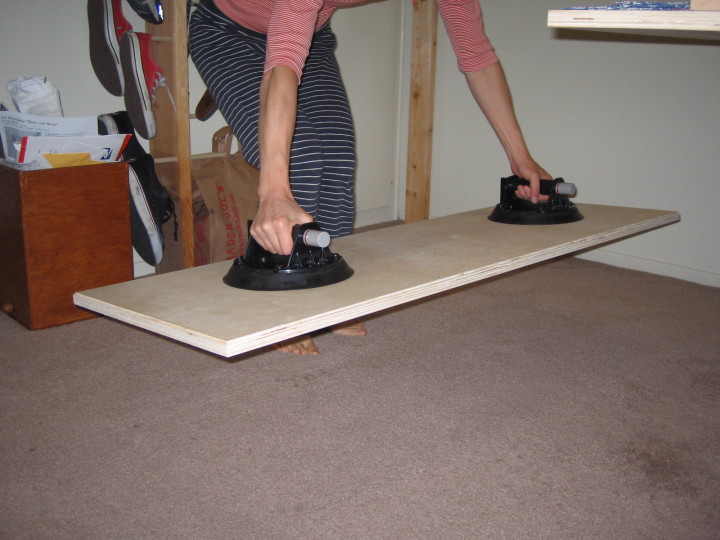
Hiro and I liked living in Gardena, but an even better opportunity appeared, forcing another furniture disassembly. Hiro was offered the assistant manager position at Little Tokyo Towers, along with a paid apartment in the building. The screws came out, we packed our stuff, and headed to downtown Los Angeles. I started straight to work on an improved version of the in-floor storage. The compartments were tall enough to hold standard file boxes. And I did away with hinges and finger holes in the panels, in favor of simple, flat, unattached panels. I ordered a pair of high-power suction cups (the kind used for handling car windshields) and they work perfectly for the purpose.
Successes: Suction cups!
Not-so-successes: Only four months, fear that floor panels will be difficult to reuse in dream home
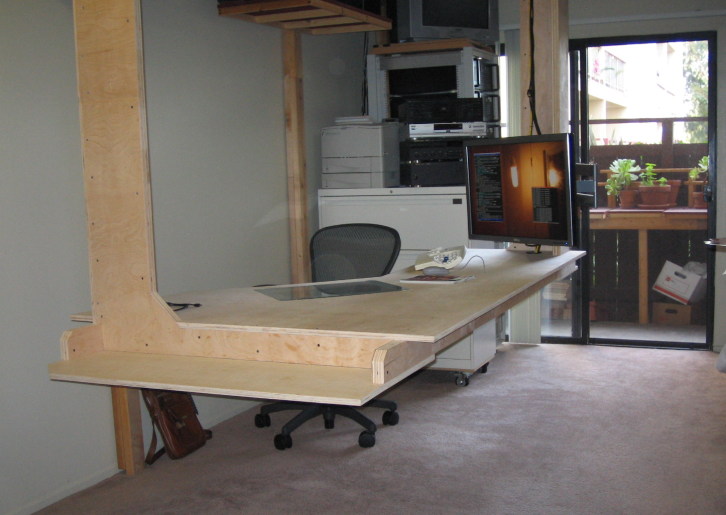
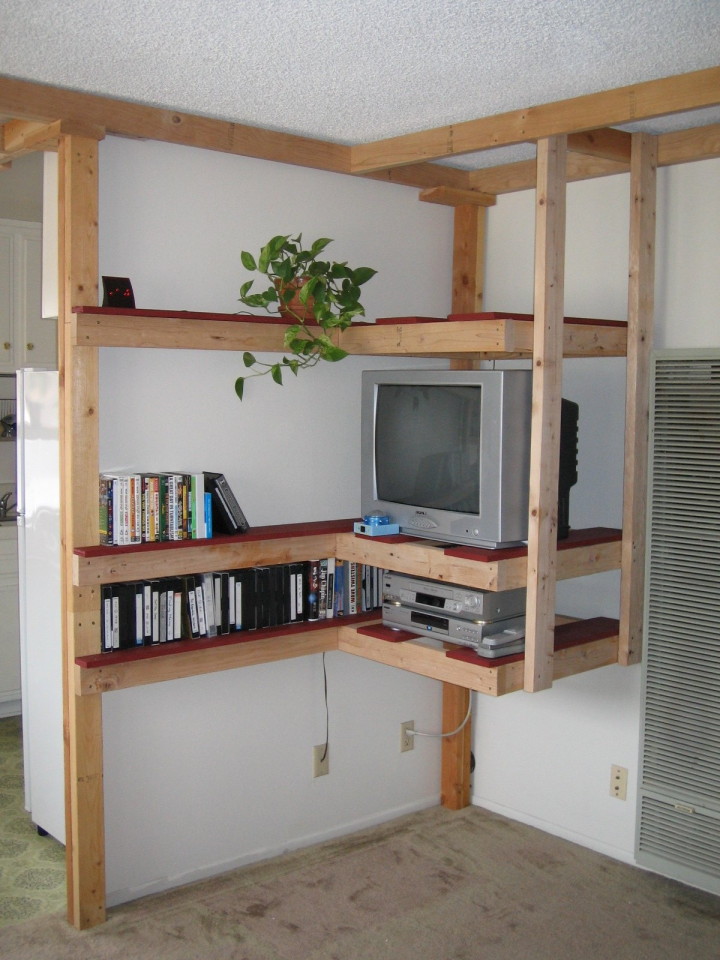
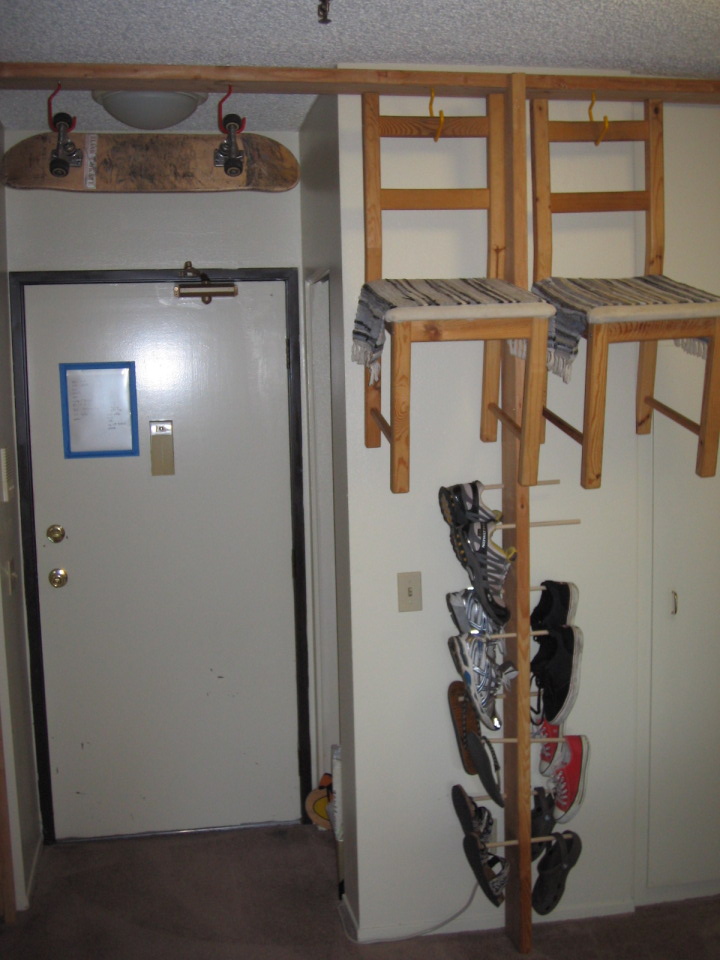
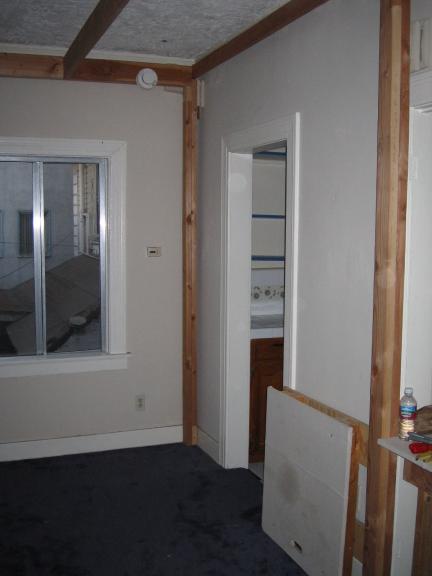
Torrance apartment
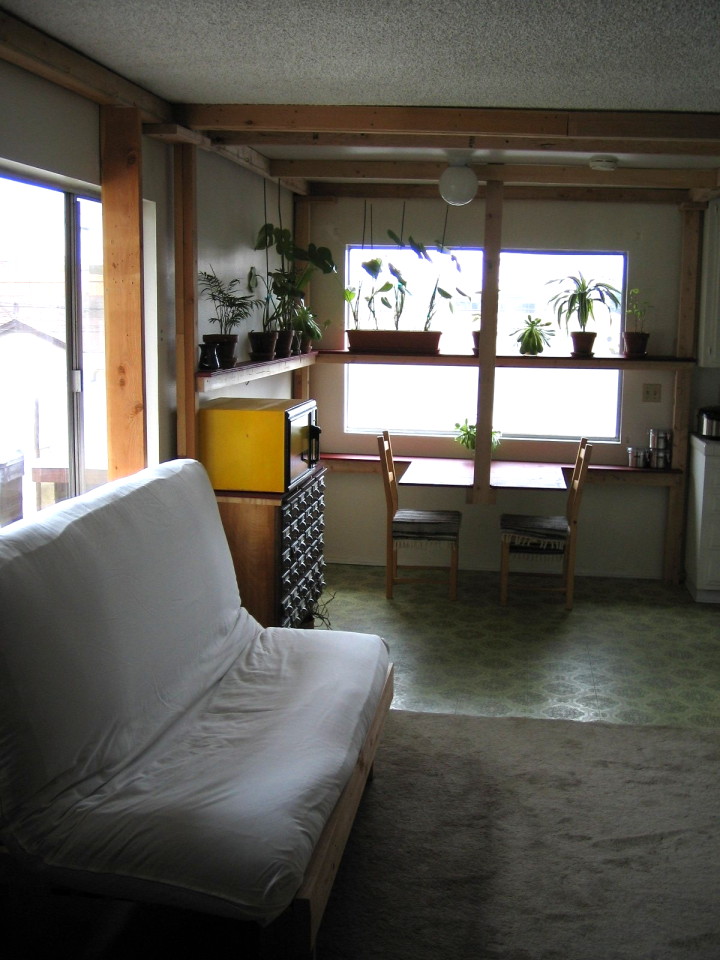
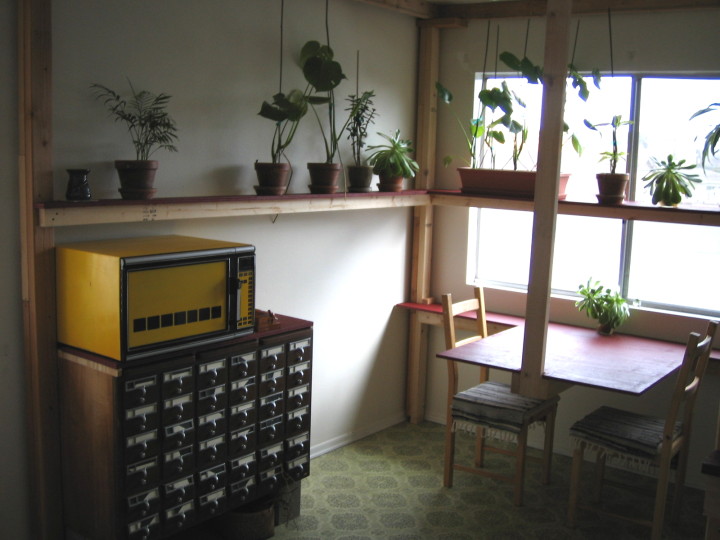
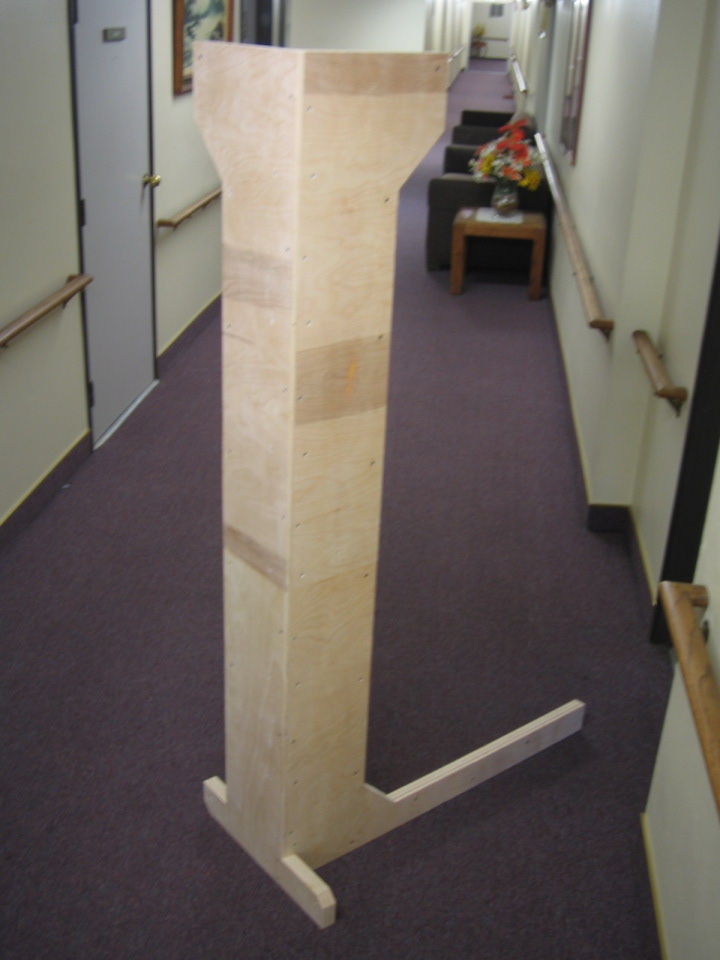
After living in Little Tokyo for about three months, Hiro got a call from her previous company. They wanted her back. And they wanted her to be head manager. So we were on the move again. In the new place, I built the main-room/kitchen frame and then focused on the kitchen. I tried the most complicated thing I've made thus far: an all-plywood desk, suspended at only two corners. It has been a grand success but I've stopped serious work on this apartment... I'm putting my energy into the dream home design!
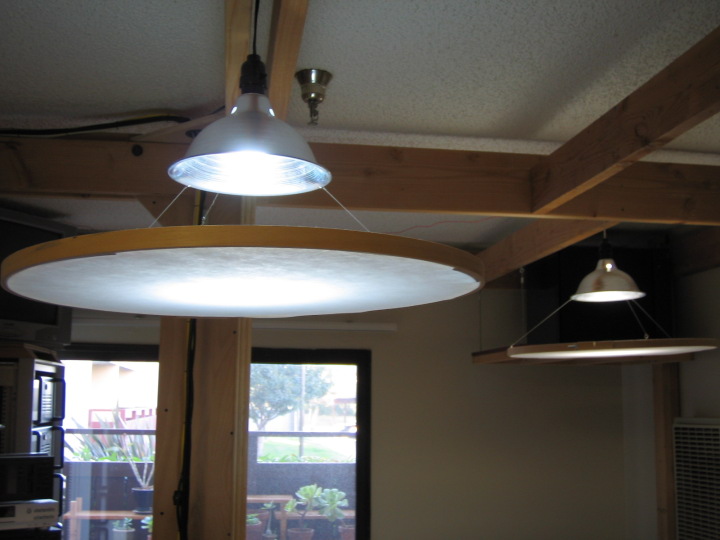
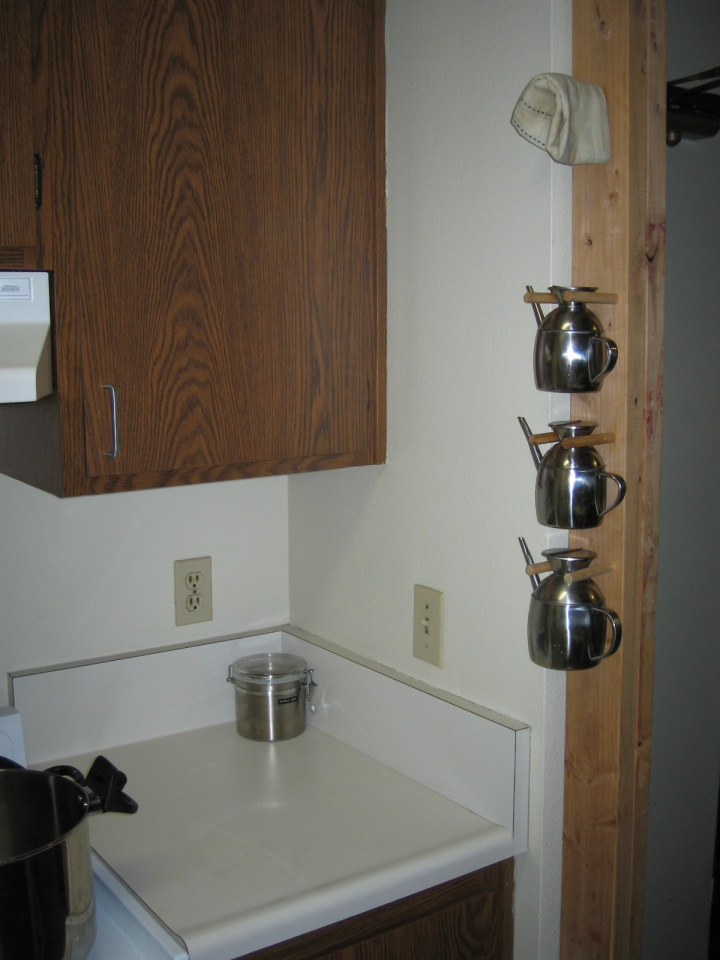
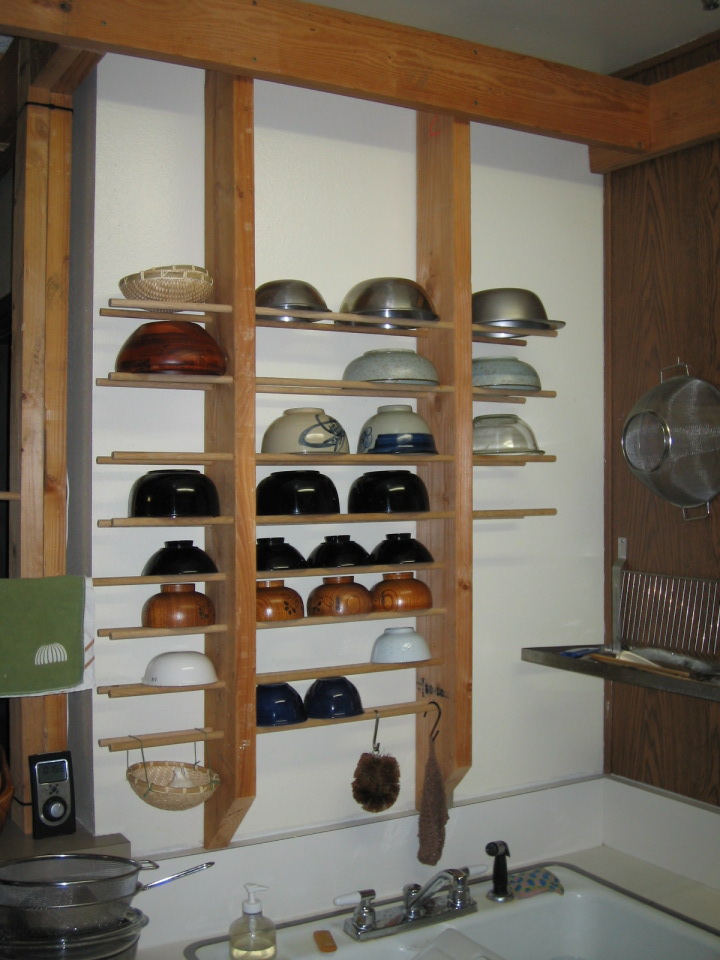
Successes: embroidery hoop lighting, oil holders w/ wipe rag, bowl holders, desk shape / structure, white-board on door for "don't forget to take:", retractable clothes lines, drawing horizontal and vertical lines on plywood by measuring from the edges
Not-so-successes: Probably should have used a CNC company to cut the plywood pieces, suspended card catalogues block view to kitchen, not enough natural light

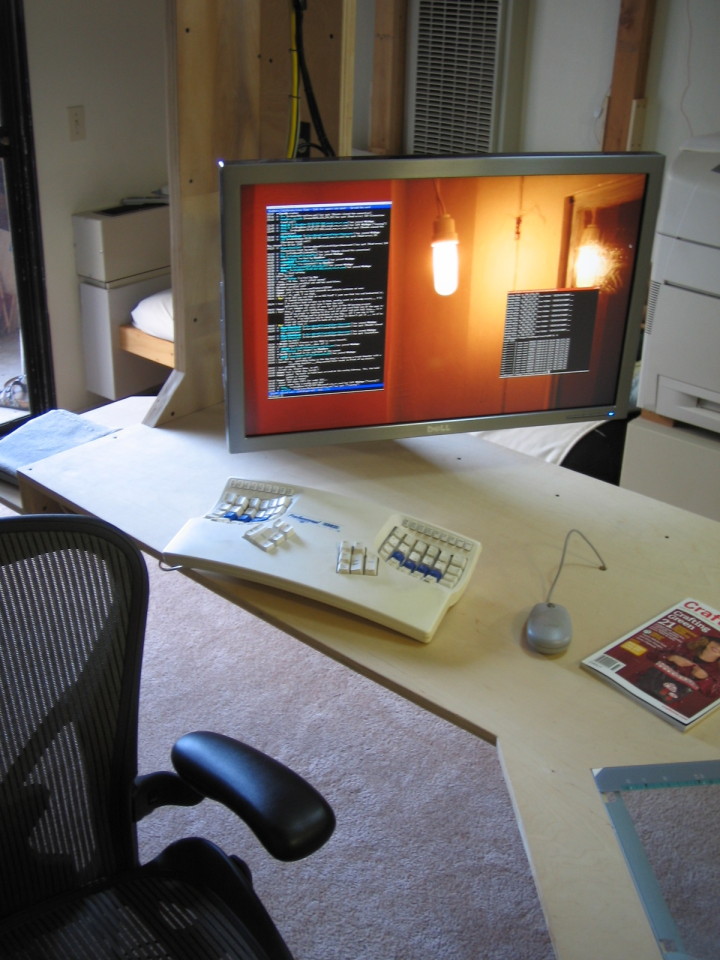
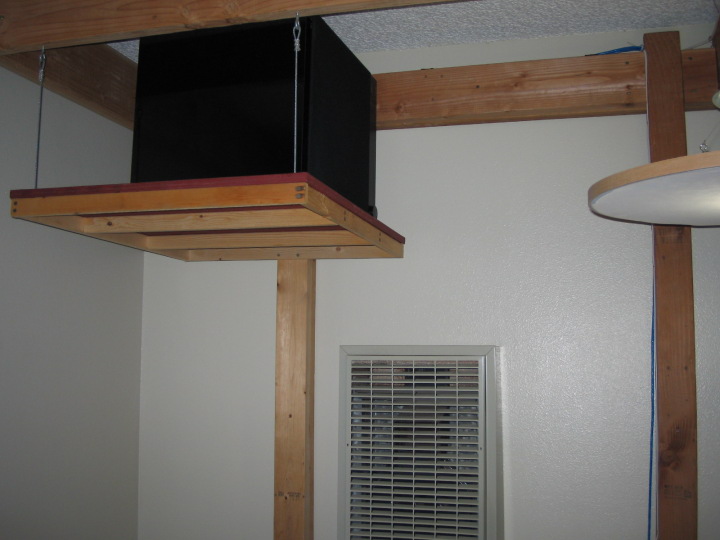
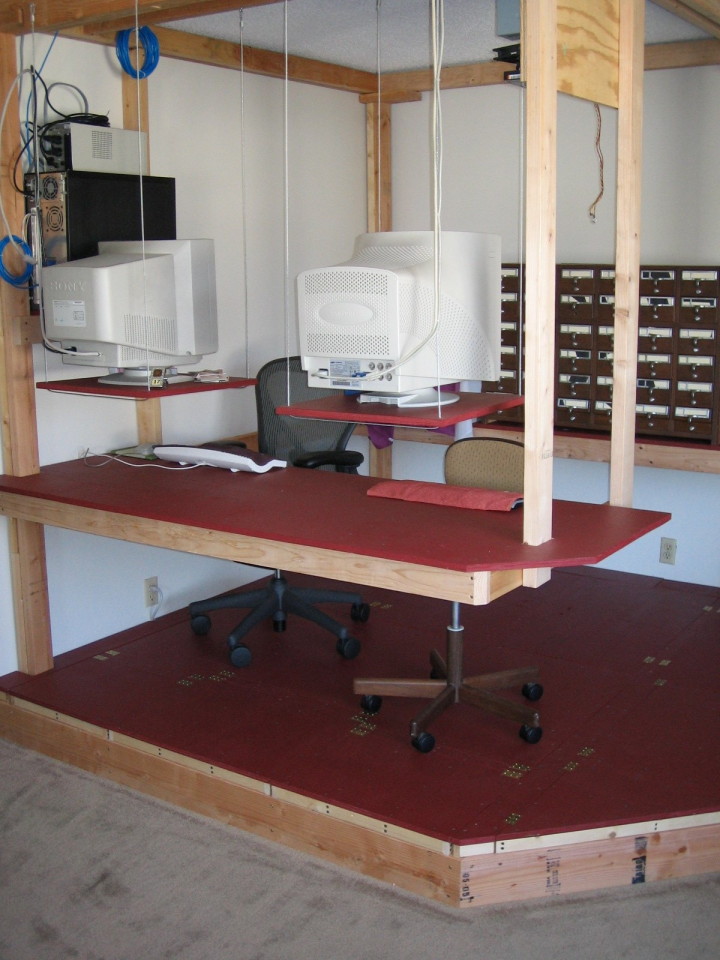
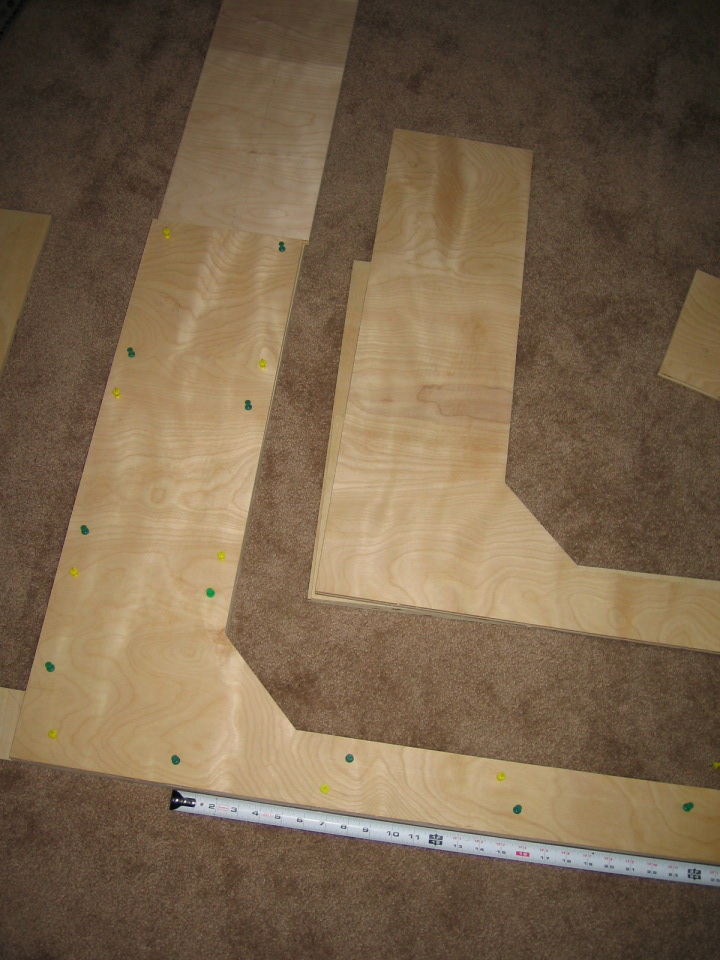
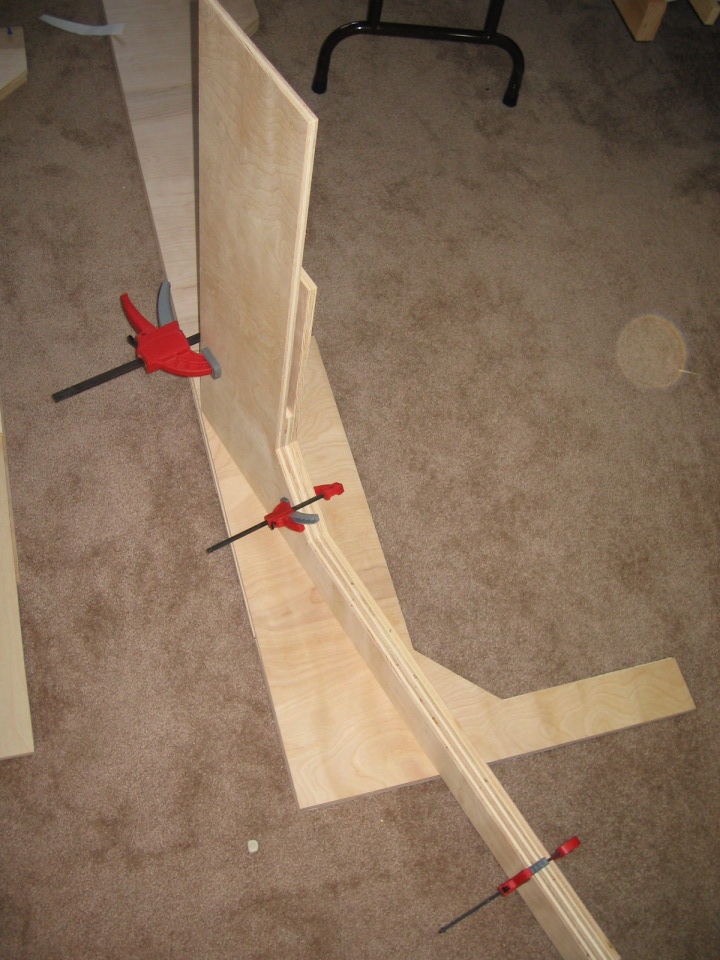
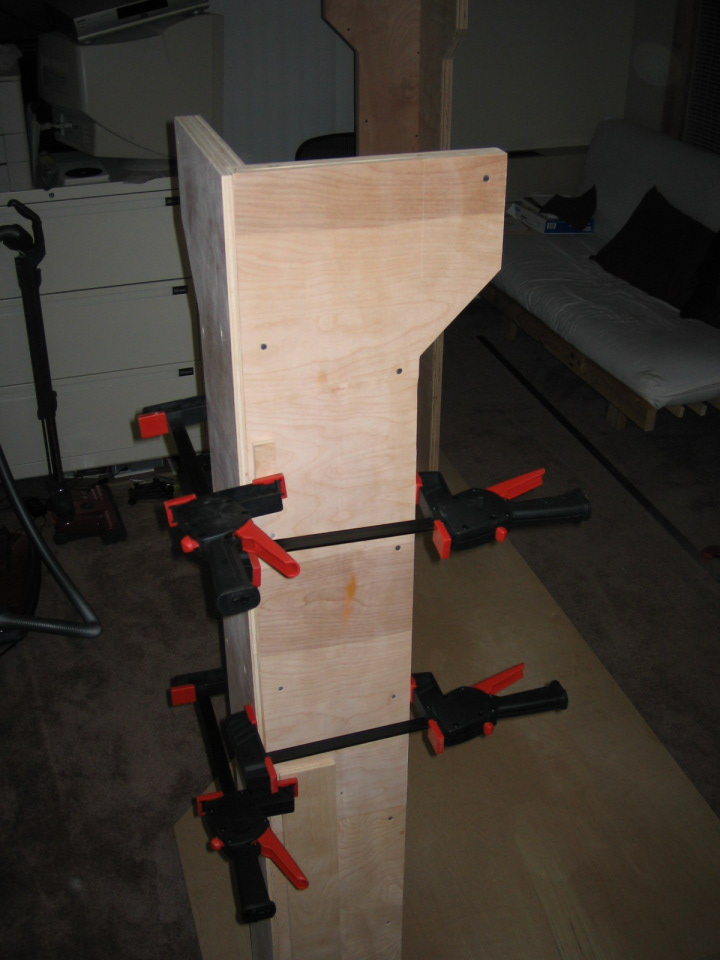
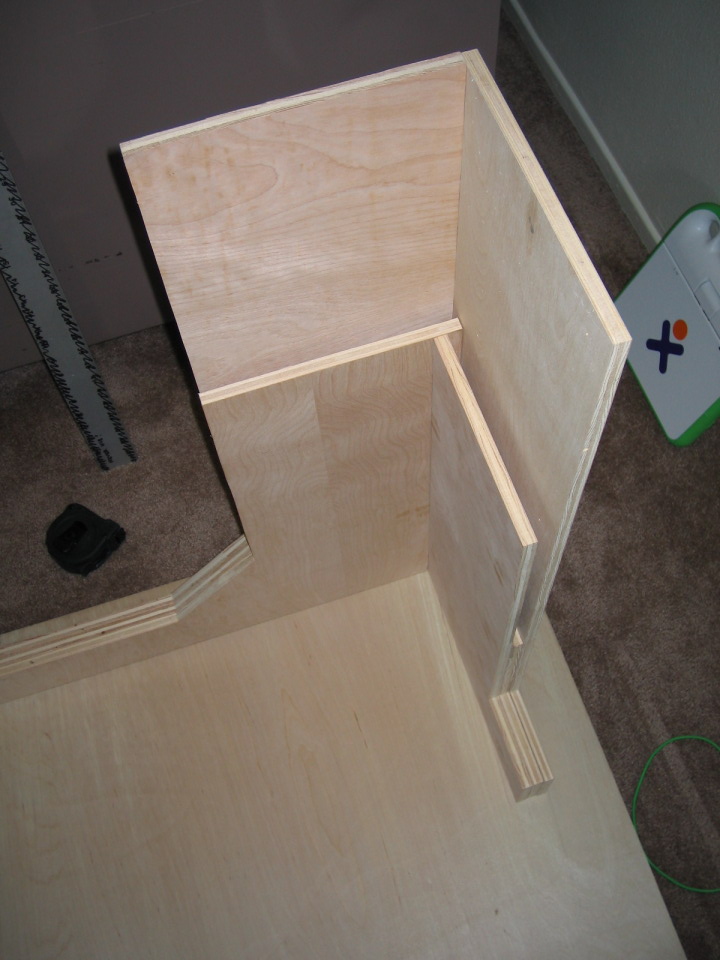
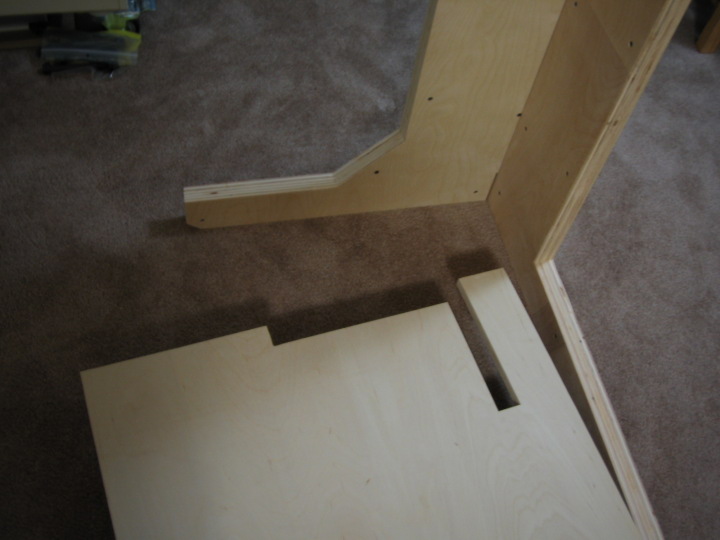
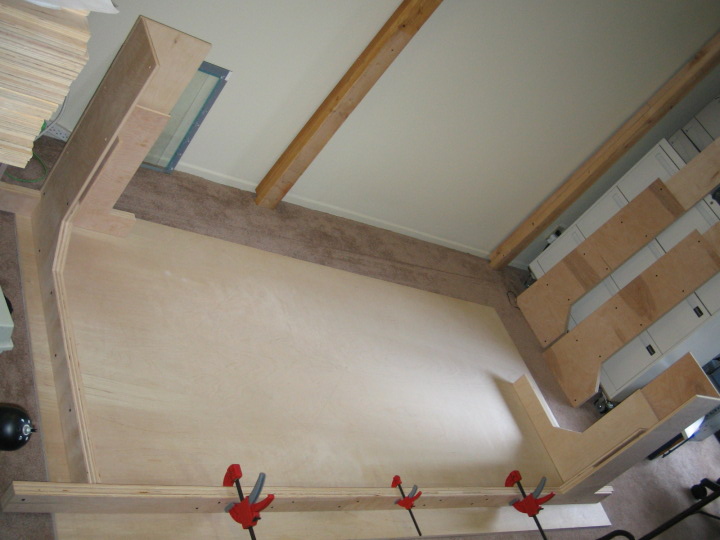
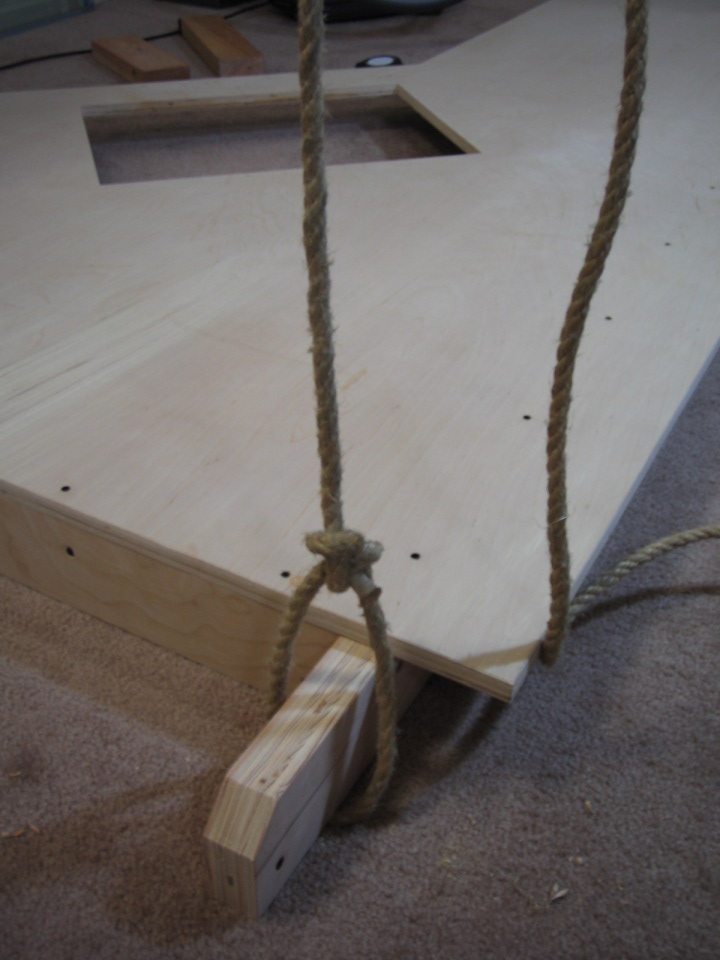
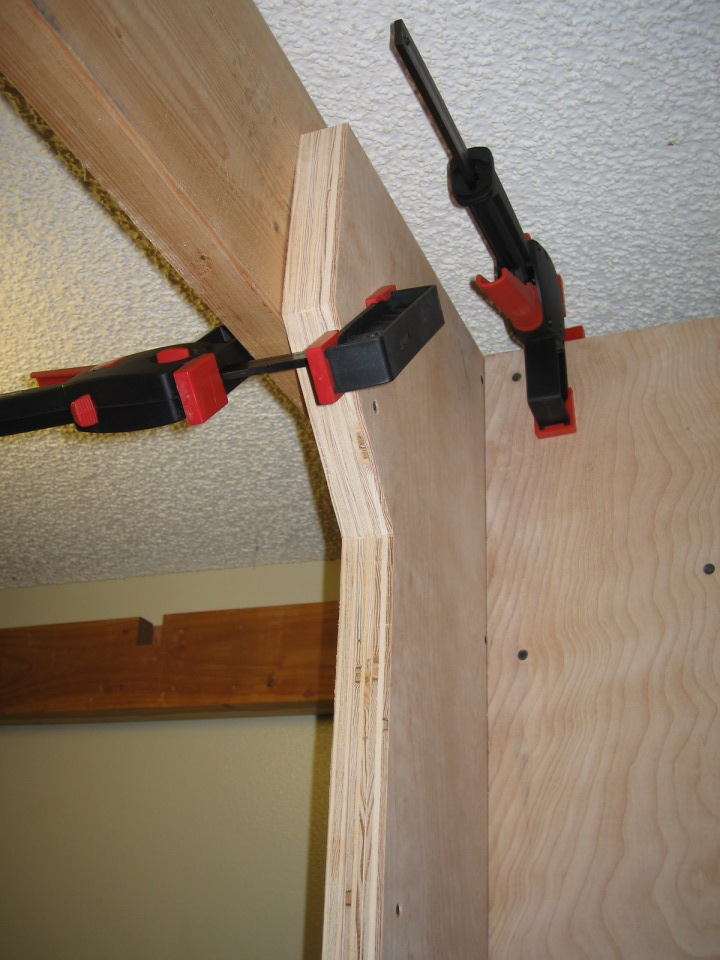
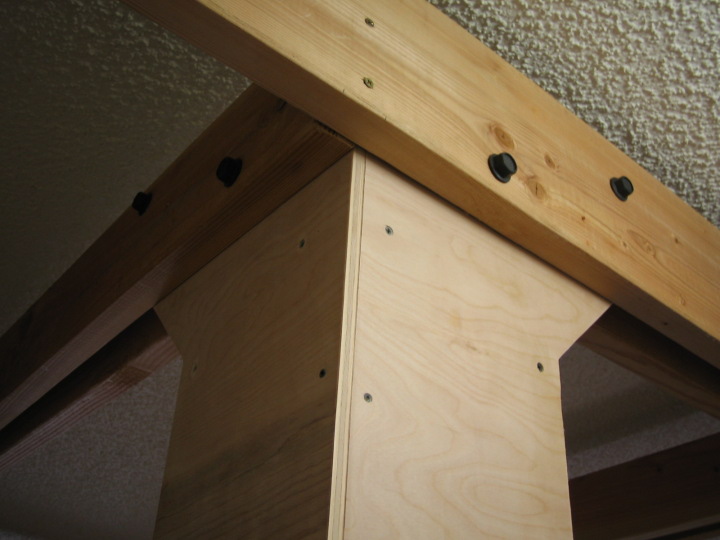
The desk was far and away the most exacting design I've tried. Before the desk, everything I made was fairly over-built. Not knowing exactly how sturdy a beam should be, I'd err on the side of extra rigidity, using a 2x6 instead of a 2x4, just in case. For the desk though, I wanted to take a bit of a risk and try and fine tune my engineering sensibilities. I wasn't sure that the desk would be stable with only the two supports, and I wasn't sure about the proper height of the built-up main beam that runs under the length of the whole desk. It turns out I still could have built it thinner and lighter, but I'm relieved it's stable and comfortable.
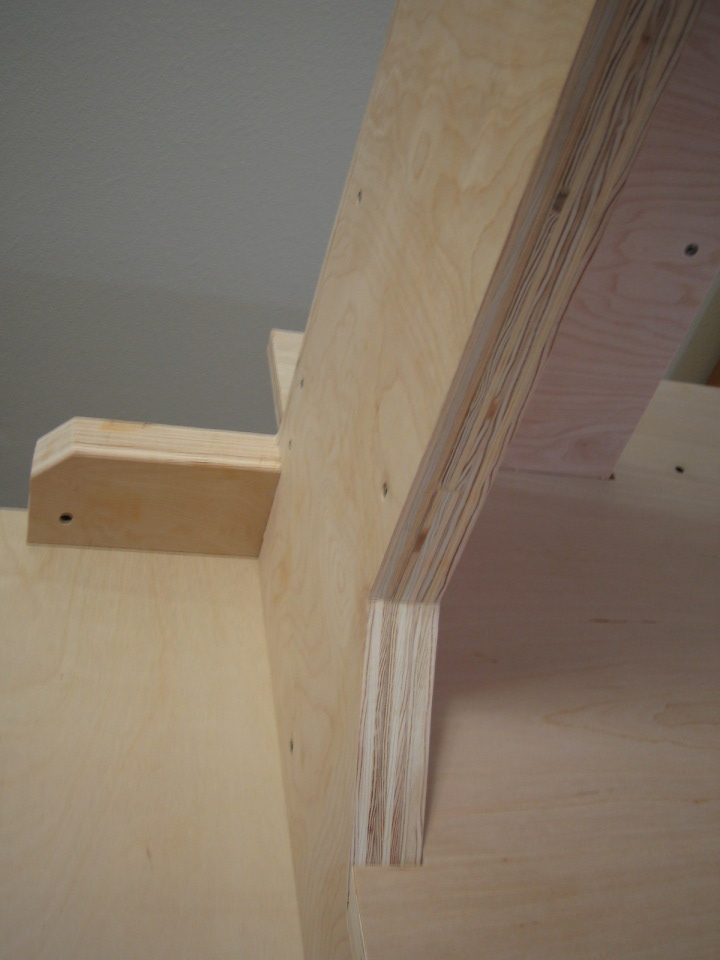
The desk is made of five, main interlocking members -- two L-shaped pieces for each vertical support, and the desk itself -- plus two, lower-height shelf spaces at each end. The vertical supports are cut in two pieces, the upper half connected to the room frame and the lower half to the desk. This would allow us to position the top portions independently if the room frame didn't exactly match the desk dimensions. The main challenge came from the fact that two of the vertical support members are larger than can be cut from a 4'x8' piece of plywood, so they would have to be built up from smaller pieces. I also wanted to utilize the wood efficiently, so after designing the shape of each finished, vertical member, I broke them into smaller pieces and then used scale paper pieces to find an efficient cutting layout. Each piece was formed of three layers of 1/2" plywood.
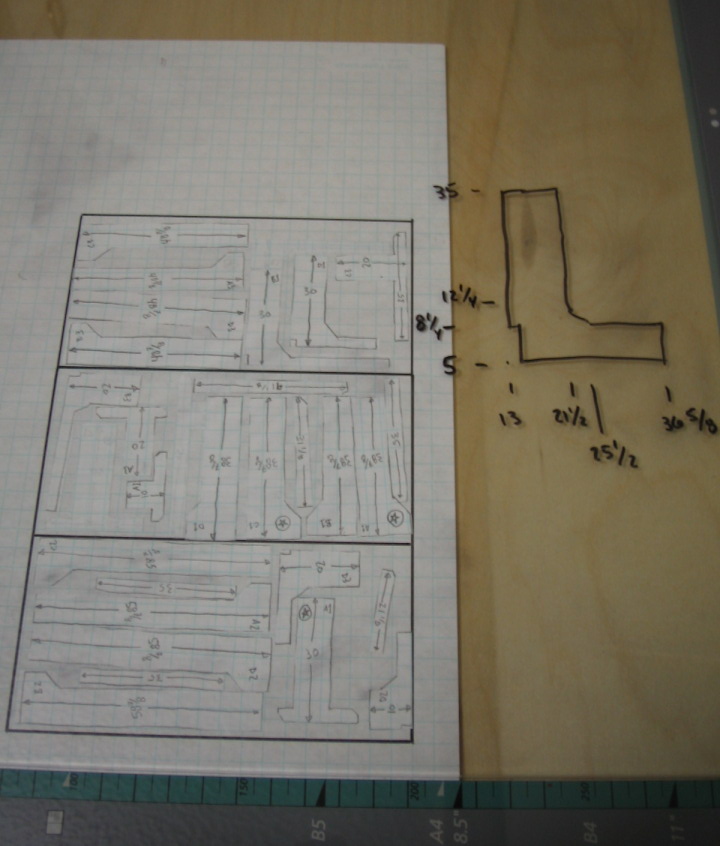
The end result was 42 pieces to be glued together. Cutting them to the necessary tolerances pushed my technical skills. The measurement was actually the hardest part. I tried a number of methods for drawing parallel and perpendicular lines on the plywood. Many online resources say not to trust that a piece of plywood is square, and to draw one's own straight line from which to work. I tried this method, using a large construction square for perpendicular lines. I made a 3x4x5 triangle out of thin cable with the hopes of further improving my accuracy. But none of these methods were better than simply measuring along the edges and drawing lines from those marks. I bought a straight piece of aluminum bar, 8.5' long at a local metal house for my straight edge. I used a utility knife to score my lines to reduce tear-out. In the end, I was surprised how accurate I was able to measure, mark, and cut. The cuts (with a jigsaw and new blades) were very clean thanks to the scoring. It took forever, but somehow, all the pieces fit together and the end result is my favorite desk yet. It has a built-in glass panel under which I can install a light table for those drawing projects I keep meaning to get to...

Tips for making your own inexpensive furniture
Over the course of living in 10 different dorm rooms in college, and 8 different apartments since, three things have held true: 1) money is tight, 2) you can't put holes in apartment walls, and 3) there's not much space. Here is a short list of the things I have learned in dealing with these facts:
1) Customized furniture beats "quality" furniture
Having just the right size and shape desk, in just the right spot, is more important than what the desk is made of. Understanding your own preferences for size and shape is hard enough... would my desk be more comfortable at 29" or 30" high? Use apartment furniture as a chance to experiment and find what's just right for you.
2) Use simple materials
- 2x4s and plywood are inexpensive
- They can be environmentally friendly (see below)
- They can be reused many times (see below)
- Use screws!
Buy reclaimed wood if possible, or look for FSC-certified 2x4s and formaldehyde-free plywood. You'll be able to reuse your wood again and again - some of the 2x4s in my current apartment were a desk in Tokyo, then shipping boxes, then a bed, a desk, and now part of the frame structure.
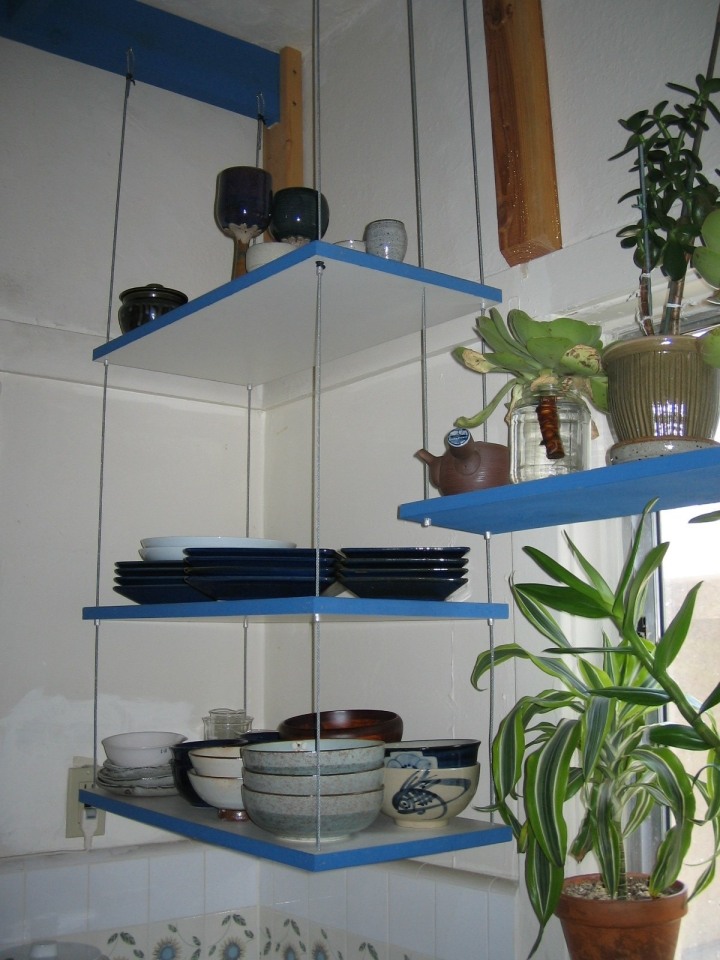
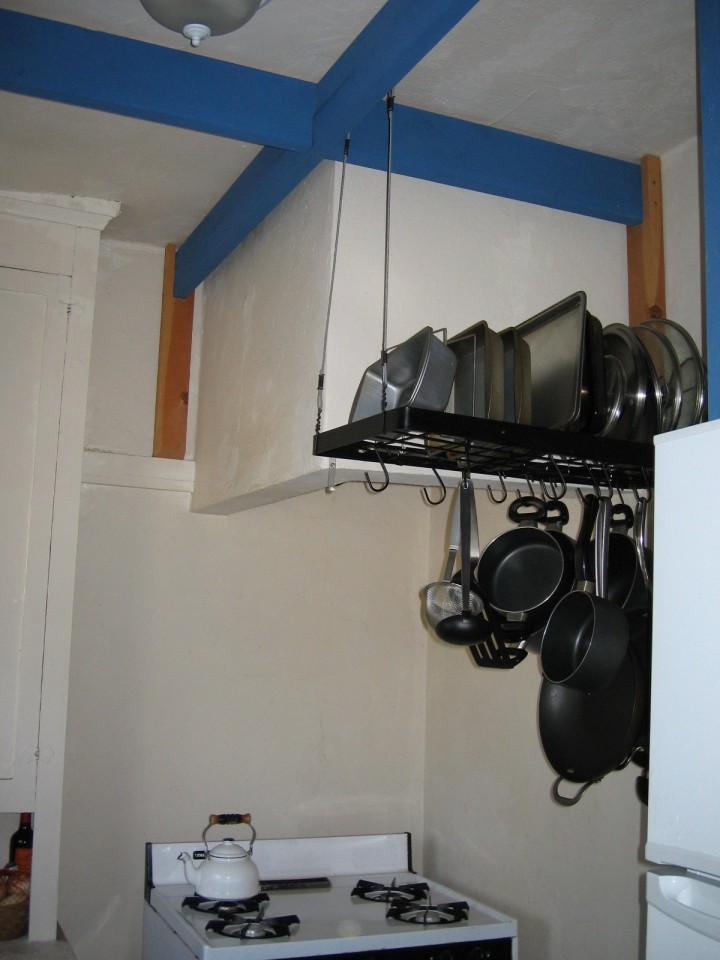
3) Hang everything!
As much as possible, I don't like having furniture touch the floor. Floor-bound furniture gets in the way of cleaning. It also makes rooms feel smaller to me. Moving objects up off the floor to hanging positions, gives feet room to move about freely and lifts the "gravity" of the objects in the room. It's hard to overdo hanging... even my refrigerator was suspended in my first LA apartment, and I loved it. In older apartments, there is sometimes substantial "picture rail" trim that runs around the room and you can build off of that (see the Burlington kitchen and bathroom images above).
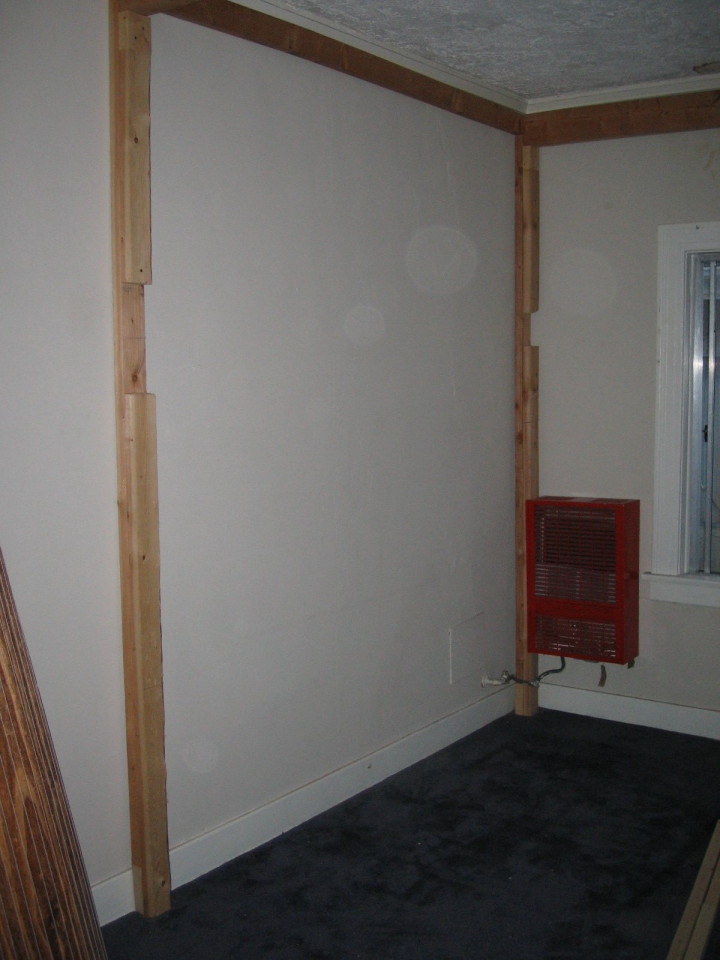
4) Use an internal frame to build upon without affecting apartment walls
In order to facilitate hanging, build a simple, internal frame that wraps the corners of the walls and ceilings, then screw things to that. Single, vertical 2x4's in the corners will usually be plenty to support anything you plan on building. I use double-width columns because I can build them from overlapping and screwing together smaller 2x4s. I often leave one of the 2x4's shorter than the other to for a "ledge" support for the ceiling beams.
5) If you can't hang, lean!
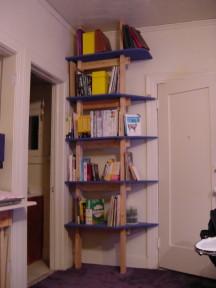
These shelves have only two legs, placed near the front of the shelves so that the entire unit falls backward against the wall. The more books are added, the more stable it becomes.
Tools
[Update 161114 -- In the intervening years, I've gradually moved to Festool for most of my power tools. The tools below were great, but the Festool system is integrated and has better dust collection. If I were just starting a tool collection, I'd jump straight to Festool.]
The tools and materials for building:
- miter saw (aka chop saw)
- jig saw
- drill
- straight-edge
- measuring tape
- earplugs, safety glasses
- 2.5" screws
Miter saw
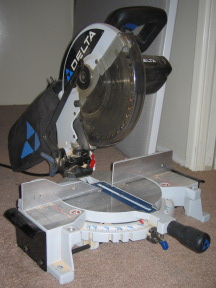
Technically speaking, you can do everything in the pictures above without a miter saw, but its speed and accuracy make the tool well worth the cost. I bought mine for about $150. Miter saws with rail slides have the capacity to cut significantly larger pieces of wood but I've been fine with this little 10" saw. When cutting the rare 2x6 at a 45 degree angle, this saw won't cut all the way through, but I simply finish the cut by hand with an inexpensive Japanese pull saw. Apparently, rail slides also reduce the accuracy of the saw, so I suppose I'd rather not have them. For what it's worth, a saw without the compound angle function would be fine for me as well. I've only cut a few compound angles (angled in two axes) in the 6 years I've had this saw.
Jig saw
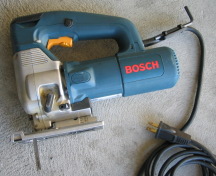
The jig saw is extremely versatile, and essential for cutting panel goods like plywood. The best blades I've found are Bosch Xtra-clean. The hanging desk in Torrance benefited from the precision of a circular saw and a home-made, 8'6" straight-edge, but a jig saw can be guided by a straight-edge as well. The only real problem I've had with jig saw accuracy is getting a feel for curves. If you push the saw to one side, the blade will bend out of vertical producing a slightly angled cut.
Drill

Any corded or cordless drill will work. I have a Bosch 33618 and like it a lot, but I'm sure newer, lighter drills are available. If you go cordless, don't get suckered into buying a huge, heavy, high-voltage drill. Mine is 18V and has plenty of power for this kind of building. The drill is strong enough to snap the head off a screw, so more power is of little use here, especially because we're pre-drilling most screw holes anyway.
Straight-edge
Do not trust the measurements on standard rulers!! My Home Depot-bought 4' measure and store-bought 12" measures are not accurate. The 4' rule was particularly vexing because it's graduated on both sides, but they produce very different measurements, neither of which is actually 4"! A decent measuring tape is far more accurate, even when using the end tab. (A true measure, from a company like Starrett is extremely accurate, but probably not worth the cost for our wood-working purposes.)
I also use an 8'6" x 1/4" x 3" strip of aluminum as a straight edge for cutting 4'x8' panel goods with my circular saw and jig saw. I bought the material at a metal supplier in Torrance for about $10.
Measuring tape
I've had a number of random measuring tapes and they have all been accurate and useful. The tape lock is the most critical -- make sure it's convenient and comfortable to use.
Earplugs, safety glasses
Please, please use earplugs and safety glasses with the miter and jig saws. Hearing damage is irreversible and cumulative. Both saws can kick eye-piercing splinters directly toward your face. Wear earplugs and glasses every time you use a power tool, so you feel uncomfortable without them.
Screws
Never use nails. They're noisy and dangerous to put in and hard to take out. Use screws for everything.
Many beginning builders make the mistake of buying metal connectors (elbows, joist hangers, etc) for a project. You don't need them if you plan the design properly. Make all connections by butting 2x4's against one another and screwing them together directly. Drilling pilot holes will likely be necessary to keep the ends of the 2x4's from splitting. 2.5" screws are the most useful length since they can join two 2x4's in either perpendicular or parallel alignment without poking through. I've tried both square hole and Phillips screws. Square hole is certainly better, but still difficult to drill without a pilot hole. With pilot holes, Phillips screws are just fine.
Considering cost
What is the right amount to spend on DIY furniture?
If you're considering diving into the DIY furniture world and will need to buy tools and materials, it can be difficult to weigh these costs against what you'd spend on IKEA furniture. Sometimes you'll come out ahead, and sometimes it'd be cheaper to just buy. For the three tools above, I probably spent $500. If I hadn't continued to use those tools for multiple projects, DIY almost certainly would have been more expensive than buying standard furniture.
DIY furniture does have one significant savings however. It often enables you to live in a smaller space, for longer. My first studio apartment in LA was tiny. Hiroka moved in with me after about a year there and we *never* could have lived there if it weren't for all the shelves, the fold-up table, the lofted desk and bed, etc. We were able to live in that apartment for a year before moving to a bigger place, where rent was significantly more expensive (from $500/mo to $800/mo). In this regard, the DIY furniture saved us $3600 by allowing us to stretch our time in a smaller space.
In the end though, by going the DIY route, I'm focusing on understanding myself and my personalized living spaces, and I'm able to create apartments that I love living in. If I'm able to do that for less than I would spend at a furniture store, that's just extra!